Wednesday, March 13, 2019

Another Stash Busting Project

Okay, first of all let me clarify......it was someone else's stash...and I had help (thank you Susan). A few years back, a good friend showed me some wool fabric she was planning to rid herself of. She had been a rug hooker for many years but had pretty much given up that hobby for several others, so of course, I could not resist these beautiful hand dyed wools and said that perhaps I could do something with it. Well...guess what...it came to my house only to sit on a shelf until I finally decided I had to use it or move it on.
The challenge was that because it was a rug hookers stash, it was not "yardage", it was pieces/strips. But it was beautiful quality in a gloriously rich, wide, range of colours. I decided to make a wool throw.....something just right for draping over oneself while knitting, watching TV, reading or maybe even a little lazy afternoon snooze.

This is where Susan came in, I had way too much and needed help using this stuff up. We split the stash...I took predominantly blues and greens...Susan, reds and oranges. We also used some thrift shop finds to supplement....a kilt, a man's suit and a few other pieces were disassembled and in some cases dyed to give us exactly the extras we needed. (for some reason I don't have any of the greens pictured here)  the pile on the right was the result of some dye experiments.


I created a conceptual diagram of the sort of thing we were trying to achieve and we were off.


The next step was to make sure everything was cleanly trimmed (the trimmed bits looked too pretty to toss away.)


and to sort the pieces by size....some were as much as 11" long, others closer to 4". then we just played laying them out to make workable rows.


We decided that we would sew them together in an unconventional way.....so that we would not be dealing with tons of seams, my reasoning for this was that I knew I wanted to do big stitch quilting at the end. I think Susan was more clever and took hers to a long-armer  ( I will explain shortly)


Once we each had a pleasing layout, the pieces were simply machine stitched by butting the raw edges up to each other and using a triple zig zag which was such a pleasant sewing process.  Long vertical rows were created, then each row was attached to the next in the same manner


While I stayed very much in a subdued colour scheme, Susan on the other hand, added some brilliant, unexpected pops of colour to hers.


Susan and I each used a thin batting and found some nice Robert Kaufman flannel for our backings


A piece of soap served to mark the concentric circles which I would hand stitch using 12wt Aurifil cotton. The flannel for the back was only 45" wide....it needed to be pieced to get the required width, Susan pieced hers entirely with the flannel


...I chose to add a row of the same wool pieces used on the front to create my pieced back


These throws finished at 60" x 50" and are super cosy


the texture added by the machine quilting is fabulous!


I used striped cotton leftovers from the backing of a previous quilt for my binding.....Susan pieced wool to create her binding


I LOVE that Susan kept the labels in place from one of the up-cycled clothing pieces


Now.......time ( and use ) will tell if not having sewn traditional seams will have been a poor decision.....I must admit that I am a little concerned about how much stress the joins will endure over time. I think Susan was wise to have her quilt machine quilted as I think that will help its sturdiness and durability.

But, I have been using mine every evening for several weeks and it is not showing signs of any problems yet....."yet" being a key word.  I may go back and add more stitching to mine just the same.

oh....and btw......we were not completely successful at "stashbusting"  LOL! 


Friday, March 8, 2019

Bluprint free month trial offer

I promise I have a fresh post coming in a day or two, but today I wanted to share a link with you.

I have mentioned Bluprint before (previously Craftsy) whatever your interests, whatever you might like to learn more about...you can likely find a class on that topic. Quilting, sewing, knitting, cooking, baking, decorating, drawing, painting, spinning, crocheting....the list goes on and on.
I quite like the platform.....sometimes I "take" the whole class...sometimes, its just one portion or technique I want to see/learn and I jump to that part of the video class. I am always amazed to learn how much I don't know I don't know  LOL!

Interested? well Bluprint is currently offering a free month trial....yup a whole month on access!

If you are curious...want to learn more....I have this link for you here

I dont think I have EVER made a post without an image so I guess I need to put something here...how about some of my recent spinning......much of what I have learned about spinning and processing fibre has come from watching Bluprint classes.


Monday, January 21, 2019

Processing fleece & learning along the way


I have not been spinning all that long and so far have only used commercially prepared fibre. When you are just starting out learning a new art, I believe using the best supplies  you can afford will help set you up for success. Using good quality, well prepared fibre allowed me to quickly learn the mechanics of spinning so that I could produce fairly consistently spun yarns.
I am still spinning simply, I do not have a wheel, not even sure I will ever want one as I really enjoy using the spindles. It is amazingly meditative.

Having said all that, commercially prepared fibre can get a little pricey especially if you don't have a local source....when you have to factor in exchange rates, shipping and import/custom fees.

commercially dyed and processed South African Top
A friend who raises sheep has often offered to give me a fleece. Up until now I had been very reluctant to accept the offer, the thought of cleaning the fleece seemed quite unappealing to me, but curiosity got the better of me and one day while visiting the ranch I told him that I would take a “bit” to see if processing it was something that I thought I would want to do after all. He stuffed a couple of large freezer bags with generous handfuls of wool for me.....grinning the whole time....he knew what I was in for.
So, I brought it home, watched a number of YouTube videos to learn what to do and more importantly what NOT to do.


The first task was to sort what I had, remove as much vegetable matter as possible and wash a batch. I was surprised to find this was not near as objectionable as I had anticipated.


The trick is to clean the fibre without felting it, which means careful handling and attention to the water temperature. Quick temperature changes and agitation will lead to a felted, matted mess that will render the fibre unusable. I made a bath of very hot water with a bit of Dawn dish soap added to help break down the lanolin and remove the dirt.....soaked the locks for 30 min, rinsed and repeated, each batch took about 3 wash/rinses before the excess water was squeezed out and the fibre left to dry.
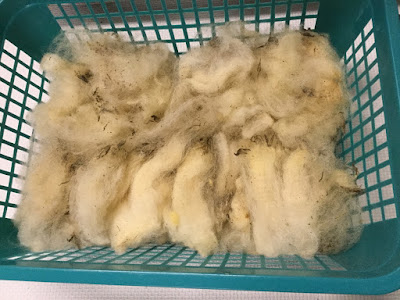
I approached this cautiously and tried a couple of different methods...batch 1, was placed in a plastic basket (holes in the basket would allow the water to circulate through the fleece as it was put into the hot water) with as little handling as possible....it worked, but not as well as I had hoped because the bottom of the basket doesnot have holes and so much of the "dirt" collected there.


Batch 2, I tried placing the fibre into mesh bags and washed that way...again, it worked okay but still did not seem to be getting thoroughly cleaned.
By the 3rd batch I was more at ease wth the process and just placed the loose fibre directly into the hot bath and continued with several wash rinse cycles.
Ultimately, a large old salad spinner works great. I can keep the fleece in the “basket” of the spinner...lift it in and out of the wash or rinse water....and then just squish out the most of the water and use the spinner's centrifugal action to force the last of the water out all with out having to touch/move the wet fibre.


I don’t have a drying rack, for that, I stretched some mesh fabric over a large Rubbermaid bin.....pulled taught it gave me a surface to lay the fleece on allowing good air flow all around.
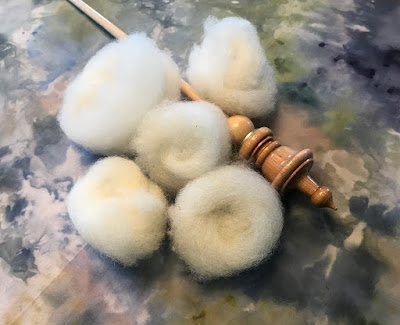
Once dried, the cleaned fibre still looked a little iffy, but I quickly found that carding (using hand carders to pull apart the fibres and realign them) opened up the matted bits and removed any more lingering unwanted material...the fibre was indeed clean and spin ready.


I carded and spun some of the plain fibre, then I played with some dyeing, mixing and blending. Clearly, I was not thinking when I dyed the first batch of locks.  I dyed them so that there was a lovely colour gradation....not thinking about the fact that when I began to card the fibre it would simply become a blend...red, yellow and orange.....made orange  duh!


then I smartened up and did 3 separate dye pots. I carded the colours both separately as well as some blending


It really is an interesting process going from the animal to the finished yarn.


Copyright Jill Buckley