Monday, December 31, 2018

DIY Support Spindle

I first began spinning in July of 2017. (that post can be found here) I began with a homemade drop spindle and while I have tried a variety of fibres, I had not yet explored a different type of spindle. I was curious about the difference between spinning with a drop spindle (where the spindle is spinning suspended in the air) and spinning supported. ( a support spindle, is as its name implies, spins "supported" generally in some type of bowl)
why had I not tried one? well I did not have one. There are many gorgeous spindles available online, but of course, by the time one adds shipping and currency exchange they can get a little pricey....what if I find I don't like spinning this way.....would be a bit of a waste. So I decided to try making my own.

I gathered a few things from the hardware store and because I wanted a tapered shaft I used an old paintbrush instead of a dowel.


I chose this finial because it had a very nice point that I thought would "spin" well.  I cut the ferrule/brush part away leaving just the wooden handle. My plan was for the wooden bead and wood glue to allow the finial and shaft to connect and bond together. I also made some with extra weight by adding a washer. and of course, played with adding colour to the wood as well.


To make the support bowl, I picked up a Danish drawer pull that has a very nice concave form. I wanted the "bowl" to have a flat base so a couple of small wooden toy wheels completed the assembly.


I gave everything several coats of varnish with some sanding in between to give the spindle a lovely sheen and very smooth feel.


These may not spin as long as some of the professionally wood turned beauties, but they work quite well and are allowing me to learn how to spin supported.


I am really enjoying spinning this way as it is even more portable than a drop spindle. Rather than having my arm up and out as I need to with the drop spindle, I can spin seated with the bowl in my lap.....everything is close to the body.....meaning I can spin for longer periods of time and just about anywhere I like.


Friday, December 14, 2018

Dyeing Fibre

Over the years I have experimented quite a bit with dyeing and painting fabrics and threads as well as a variety of surface design techniques but up until now I had not tried to dye wool fibre. Since I have become interested in spinning yarn, it naturally follows that I might want to dye the fibre I spin.

To get started, I took a couple of excellent classes offered on BluPrint, and watched a great many You Tube tutorials. Wool ( a protein fibre ) needs both acid and heat to activate and set (exhaust) the dye.  I began gathering the supplies I would need. I did not want to be doing this in my kitchen so I purchased a single burner unit expressly for the task. I already had an enamel kettle from our camping days but it did not have a lid....no worries, found one at the thrift store ( a glass lid which is perfect as I can monitor the process without removing the lid.) I was also able to find a large stainless steel colander. I found the small glass measuring cups and steamer basket at the dollar store.....along with a few other little things that will be dedicated to working with dyes.


here is the set up, dyes have been mixed, fibre has been soaking the citric acid solution ready to accept the dye and have the heat turned on.


I began adding different dye colours allowing them to move and mix.....it was looking pretty good in the pot


I wanted to leave some white bits but as it turned out that I had apparently left too much white, I guess it was hiding on the underside so when it was fully dried I was disappointed with the result......but hey, that simply turned into an opportunity to use another technique to resolve the problem.


I once again soaked the fibre, the same fibre...I was basically going to overdye it now.... but this time I placed the fibre on plastic wrap and carefully applied dye to the spots that were calling for it. The next step was to wrap up the plastic encapsulating the fibre and put it on the steamer basket back in the pot (there was a few inches of water in there) and turned on the heat bringing it to a simmer.


that worked like a charm


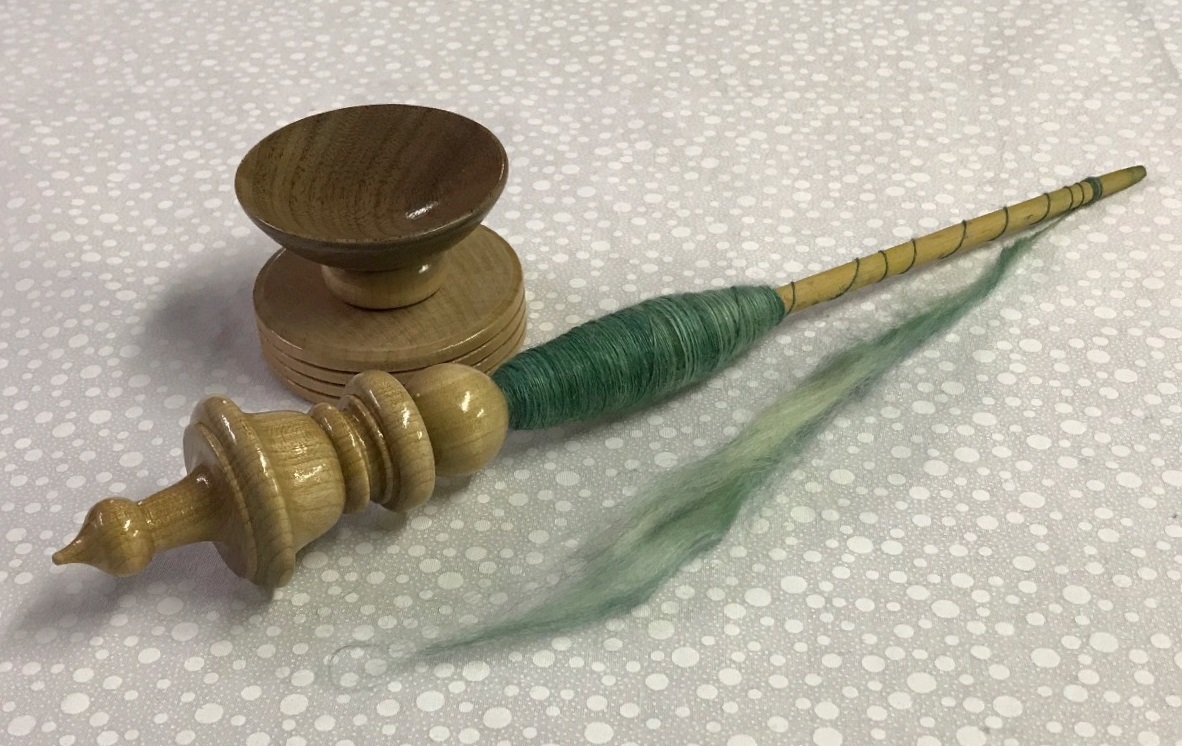
I spun this on my drop spindle and wound it onto bobbins to make it easy to ply them together.
I found this lazy Kate at an antique/vintage/junk store, took a little digging to unearth it but it will come in very handy....the bobbins that came on it are quite small but the vintage bobbins I already have fit on it nicely  (gotta admit it is kinda fun searching for these things)


I wrapped strips of wool fabric around the rod to help keep the bobbins from spinning quicker than I could ply.

The trick with spinning on spindles and then creating a two ply yarn is to not end up with too much waste. I don't think I could have gotten much closer than this.....there was probably not much more that a yard difference on the spools.


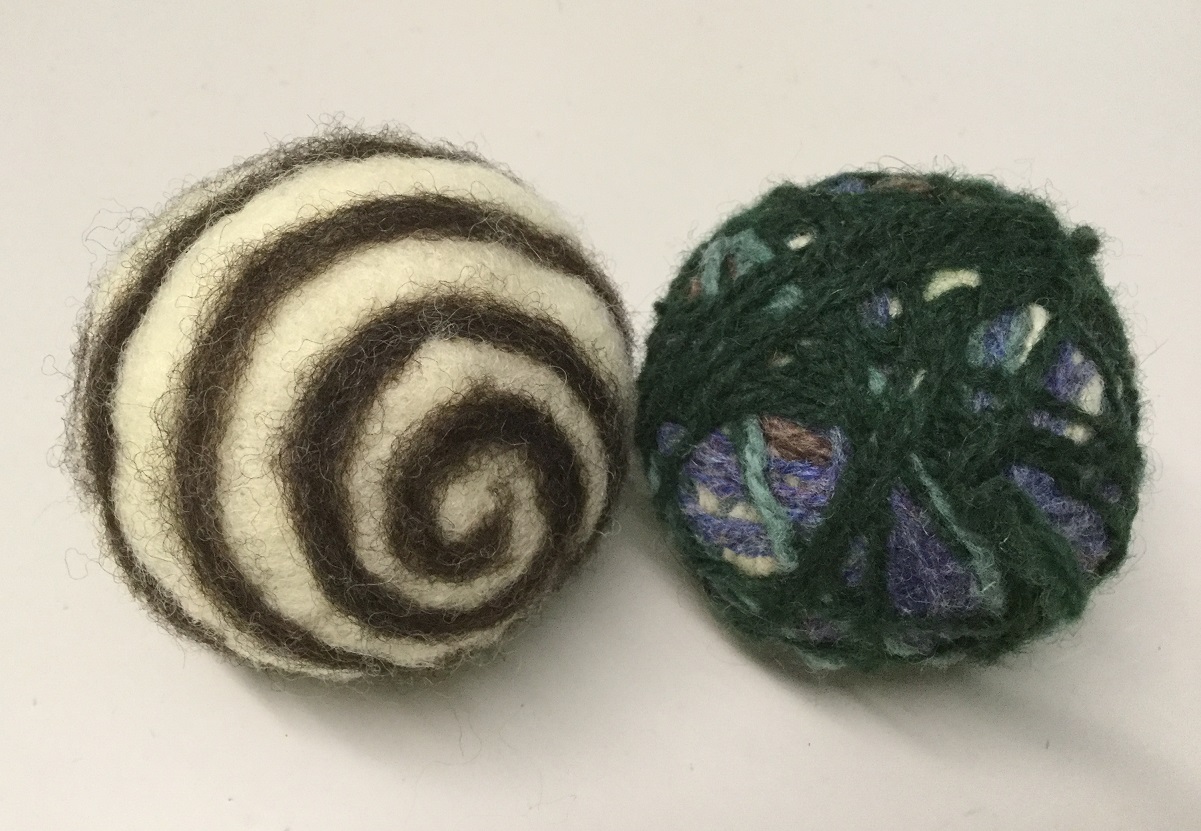
and here is my finished hand dyed, hand spun yarn


I see a LOT more experimenting in my future.


Thursday, December 6, 2018

Dryer Balls

I have been hearing about the use of dryer balls more and more lately and decided to try making a few to see how well they actually work.
If for some unknown reason you have not heard of these, they are suppose to replace the use of dryer sheets, reduce static cling, provide more airflow around your garments in the dryer which should result in less drying time.  Clearly lots of benefits
Of course, a quick Google or You Tube search will yield many tutorials on how to make them. I tried a couple of things, this is what worked best for me.

I started gathering up my supplies, I had a large 100% wool thrift store sweater that was destined to be ripped apart (that would be my core) note...it MUST be wool....it needs to "felt" so acrylic will not work. I pulled together random bits of wool fibre (batt and rovings) that would become the outer crust. In addition, I dug out my rarely used needle felting tool, a pair of pantyhose and I was ready to go. (the needle felting tool is not essential, but since I already had one, it did make the process very easy

First, I began deconstructing the sweater and created tightly wound, firm, tennis sized balls.


next I began layering fiber over the wound yarn and used my needle felting tool to help secure it in place, I encased the wound balls with several layers.....then I started to play.


Because...who wants plain old boring balls? I used some contrasting fibre to add interesting pattern


once I was satisfied with the size and density of each ball they were placed into one leg of some pantyhose.....it was stretched and tightly tied between each of them as they were added, if you look close you can see the knots.


then it was  a trip to the washer with HOT water and soap. They all felted well and were able to then head for a spin in the dryer to finish the process after which they were released from the pantyhose, ready for regular use.


I have done several loads of laundry since making these and am finding that they do in fact work very well.     If you are wondering, I have been using 3 - 4 at a time per load


Copyright Jill Buckley