Showing posts with label roving. Show all posts

Tuesday, August 22, 2017

Fluffy Fibre......to Knitted Stitches

I am still working out how to spin on my DIY drop spindle.
I began with that 3.5 oz braid of dyed roving that I purchased from a local vendor....after reading tutorials and watching youtube videos, I gave it a shot.....I showed my first "test" subject in an earlier post (here), today I thought I share the process from start to finish.

In order to create plied yarn, I would need 2 balls/bobbins/skiens of spun roving. I broke off 2 equal (roughly) sized amounts of roving and began spinning......once I finished each chunk (my spindle was reasonably full)  I would need to take it off, keep the 2 separate....then find a way to ply (twist) them together to make my yarn.
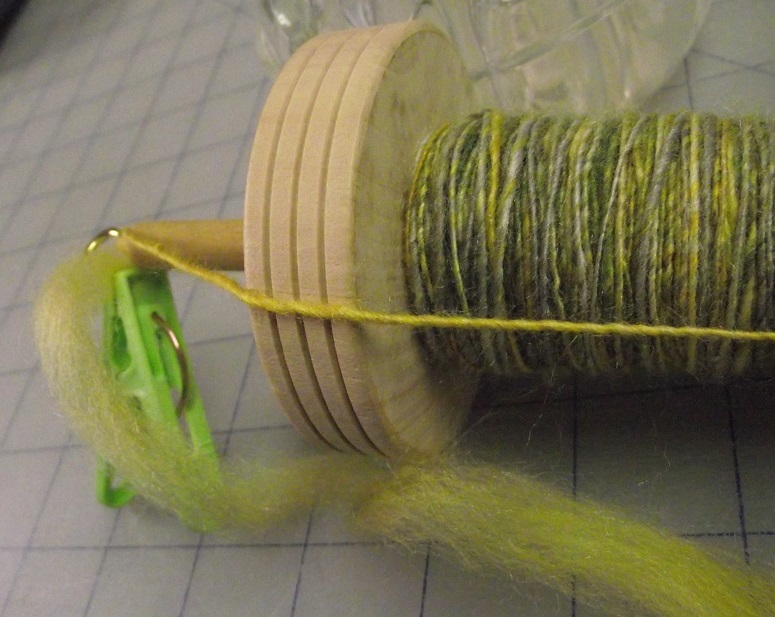
spun single in progress.

So I decided to make myself what is referred to as a Lazy Kate (or maybe just a "Kate"?)
I happened to have these vintage bobbins on hand (they were simply decorative with my sewing collectibles) once emptied, they would be perfect.


I gathered some supplies.....a sturdy box (gift box from the dollar store) a few knitting needles from my stash of many many duplicate needles (knitters out there know about that LOL!) and some binder clips


 I wound the "singles" off the spindle onto each bobbin


I attached binder clips to an extra knitting needle as guides to keep the fibre from getting all tangled


The spun fibre glided off the bobbins quite smoothly as I plied them together (back onto the spindle.)
Once the yarn was "plied" the next step would be to "set the twist" and to do this I would need something I could wind the yarn onto that would keep some tension and allow me to immerse it all in a warm bath......so I needed to make what is called a "Niddy Noddy"
I went to the hardware store and purchased some PVC pipe 1/2".....2 T connectors and 4 end caps.
note: the grey PVC is found in the electrical dept and is almost half the price of the white PVC found in the plumbing dept)

Because the yarn will wrap around 4 times for each pass.....my center pipe measurement at 12" will give me a 4' long skein. The bonus is that this can be taken apart, laid flat and if I wish, I can create different lengths of skeins by changing the center pipe length


The image below shows the yarn wound on the niddy noddy, along with the resulting skein of plied yarn.

Next I wanted to see if I could set the twist on a single ply. I am so pleased with how it turned out!
how amazing to be able to take fluff


and turn it into yarn with some pretty basic tools, this is a swatch I knit with my single ply yarn, to give you an idea...it was knit on size US 0 needles


This is a slow process, but it is so gratifying. I have found it so relaxing...and when I spin, I seem to loose track of time.

I have to tell you a story.....when I purchased this roving at a local craft/art show, I had asked the vendor how much yarn I should expect to yield from this particular braid. Her answer was that it depended on how thick or thin I would spin it. (okay that makes complete sense) so I replied as an example DK weight??? Well...a customer standing at the same booth, rolled her eyes and basically made a pffffftttt sound....turned to  me and said (insert condescending tone)...."oh...if you are just learning to use a drop spindle you WON'T be spinning anything THAT thin!"  uh .....yeah.... thanks for the encouragement.....perhaps she was trying to be helpful.....but her tone and body language said otherwise.
So as you know, I do LOVE a challenge......don't ever tell me what I can NOT do! But that is me.....someone else might have been so discouraged by that remark that they may have not tried at all and miss out on the of joy this art.


Sunday, July 23, 2017

Learning to Spin

I seem to have this thing about trying new (to me) ways of playing with fibre and have wanted to try my hand at spinning for some time now.  This past winter, I created my own DIY drop spindle that would allow me to "ply" reclaimed yarns and so was able to get a feel for working with it, but still had not actually tried to spin my own yarn.
When I saw this particular batch of dyed roving, I knew the time was right to take up the challenge. As I mentioned in my previous post, I spent a lot of time watching a variety of You Tube videos and reading many tutorials before diving in. I did not expect to be perfect first time out of the gate. I am aware that the nature of hand spinning on a drop spindle means there will always be some inconsistencies, but I think that is also what makes it so intriguing.

I am taking it slow, methodically pre-drafting the roving, getting a feel for how to manipulate those delicate fibres. At this stage, I am using what is known as the "Park and Draft" method

.

I am trying to spin a fairly fine strand......but at the same time, something I can keep as consistent as possible.


I spun the roving clockwise and once I had enough built up on the spindle to try the next step in the process, I split what I had into 2 little balls and set about to ply them together.


and plied counter-clockwise  (to take the photo, I "parked" the spindle in a glass flower frog) and to keep the little balls from tangling together, I placed each of them in their own glass jar.


I do not have special tools for any of this, so I set the twist by wrapping the yarn around a flexible thin sheet of plastic ( it was originally the cover from a document folder ) and placed it to soak in warm water for a few minutes. Once the excess water was squeezed out, the little hank was hung and left to dry.


It may not be perfect.....but I am thrilled with the result of my first spin experiment.

To give an idea of the size or "weight" of this yarn....I am getting 14 wraps per inch.
Because I am learning as I go, I decided to work through all of the steps of the process on a small scale, so that I now feel I have basic understanding of the mechanics involved and am ready to try spinning a full skein.  
Even though I don't have fancy tools, I believe using a quality roving makes a huge difference. This particular roving is 70% Merino wool 30% Silk and was purchased locally from Debbie Jamieson Owner/Dyer  of  The Loving Path Fibre Arts, you can find her on Etsy and Facebook


Friday, July 14, 2017

A Little of This and a Little of That

What have I been up to?  well..............lets see
Got this gorgeous roving last week.......I am very aware that learning to spin on my drop spindle will take patience and practice, but I have been watching lots of tutorials on You Tube, I think I am just about ready to give it a try.
I am still hand stitching my big quilt (although I must admit it is not receiving as much attention these days) but I have made it all the way to the outer border. If you don't recall this stash busting quilt, you can see earlier posts here and here


What I have been doing, is spending lots of time drawing on my iPad. I especially enjoy being able to sit out on my deck while drawing....the breeze can't blow my drawings away.
I was recently asked to share my process for creating Mandalas (like the ones shown below) using my iPad mini2, Concepts and my new Bamboo Sketch stylus by Wacom


if you are interested in taking a look, you can find the online article here, even if you don't want to "read" the technical stuff, there is plenty of eye candy and some fun to watch, quick little video clips.
A special thank you to  Erica Christensen for her work on this piece (she makes me sound like I almost know what I am talking about)

Oh, I even used the app and stylus to remove and replace the original background of the bio photo, now it appears that I am standing in front of one of my Mandala quilts.  :-)


Copyright Jill Buckley