With September being National Sewing Month & back to school time, Janome Canada is celebrating with "An Apple a Day" over on the Janome Life blog. Something "apple" related is being posted
everyday this month. I am quite happy to be one of the contributors and since I seemed to be in design mode anyway, I created a continuous line quilt design.
I did 3 actually, 1 pretty basic, another, just a little more challenging, and a third for those who want to take it a bit further.
So, if you are interested in these designs and want to try them for yourself, head on over to the
Janome Life blog and grab my downloadable PDF. These free designs are printable and ready for you to play with....(even if you don't want to do free motion, you could adapt them for applique or perhaps have a fabric painting/colouring session).....hope you like them!
Of course, I couldn't just stitch the design, I also thought I was due for another round of playtime with discharge paste, mine is called, "de-Colourant". You can find out more about this product
here
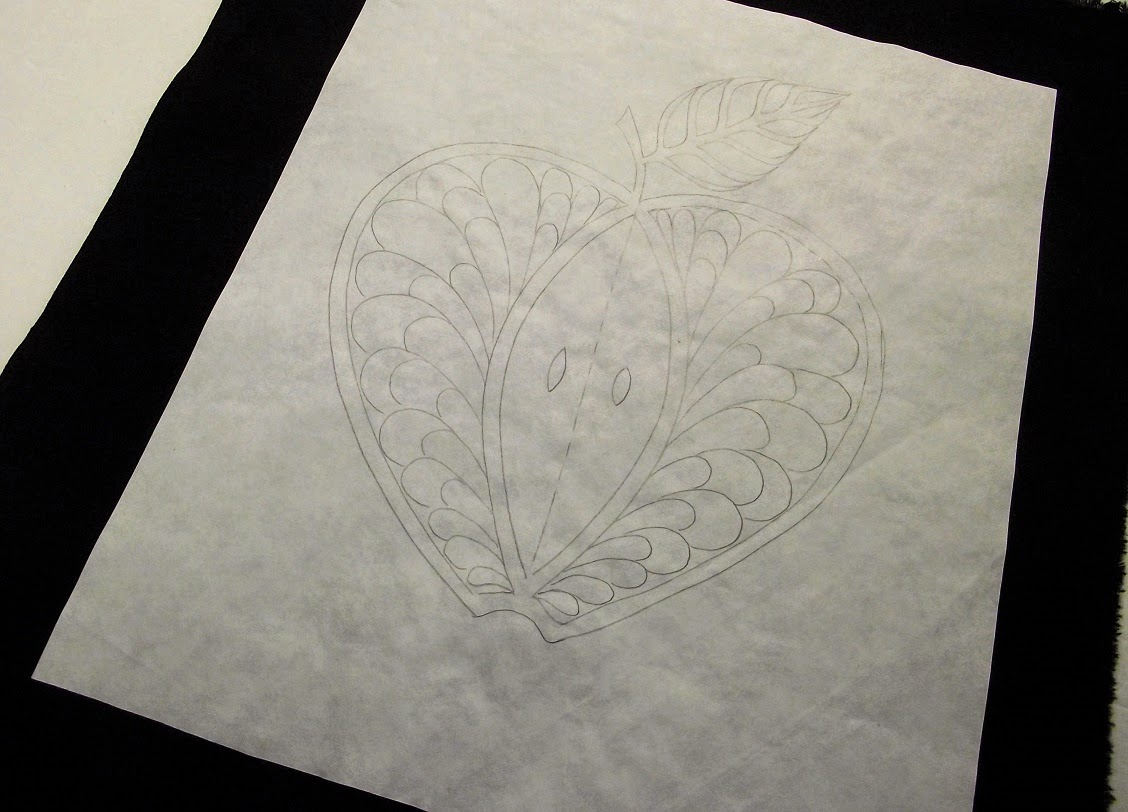
I have shown this technique before but here is a refresher. I traced the design onto a piece of freezer paper, pressed the freezer paper to my black cotton fabric,
then went to the machine, removed the bobbin as well as the thread from the needle and stitched along the design lines in order to make perforations. The next step was to brush on the discharge paste. once I was sure I had distributed the paste evenly, I carefully peeled off the freezer paper and left the piece to completely dry.
The final step was to hit it with a good hot iron using plenty of steam. The discharge paste had made its way through the perforations, once activated by the steam, this is the result.