Showing posts with label designing. Show all posts

Monday, November 7, 2016

Amaziograph.......amazing!

I have been intrigued by some short videos floating about in cyberspace showing a very interesting app that allows one to draw wonderful symmetries. I found it in the app store (currently only available for ios devices)  It is called "Amaziograph"  While it likely would not be considered a serious drawing program, it sure is a FUN way to play with design ideas......maybe just a wee bit TOO much fun.

I downloaded it late last week and I must say, I found it to be pretty user friendly.....here is a look at a few of my drawings, keeping in mind, with this app, I need only draw one portion of the design, the app repeats each stroke for me as I go along.  Guess I can put away my mirrors that I have used for so long to create symmetrical design.


these are just examples where I am creating Kaleidoscopic type images, this app allows you to do so much more.

I found lots of videos showing the app in use... but not much in the way of a basic tutorial showing what to expect....the tools, options, how to make copies, save, export and all that sort of thing.....so...I made one.  I have only touched on the basics to get one started, there is much more to explore....and yes...for those who love to play with colour, you can pull up a pallet, mix colours, add colour with varying degrees of opacity, and well....if you have an iPad and like to experiment with design....you just may want to give this a look. But don't say I did not warn you....it is addictive!

here is a link to the video tutorial I made....it is not slick, but it will certainly help get you started if you are unfamiliar with this sort of program


Tuesday, October 11, 2016

Bookmark design

In August, I came across a call for entries into a bookmark design competition. The competition would see 5 favorite entries chosen and another 60 shortlisted to be voted on (for another 5) to determine the top ten "winners"

well......I did not even crack the top 65...oh well...that is how it goes.

But....actually, I am not all that disappointed, because I really, REALLY like my design. Now, I am considering various ways I might use it. I had originally left it fairly "uncluttered" as it was to be a bookmark aimed at the adult colouring book market....my plan is to develop the design a little further and add those extra details that are more "me"


Monday, August 29, 2016

The Big Quilt Bee

Recently, I was asked if I would be interested in creating a design specifically for an upcoming event. Of course, I eagerly said yes and got straight to work.  The Canadian Quilters' Association will be holding a Big Quilt Bee at their national conference in 2017. You can find out more about it here


This bee will appear on posters at quilt shops, web pages and a variety social media sites and who knows where else.  When I design something for a specific purpose I always keep quiet about it until the end user sets it free......I saw it land a few places last evening so I thought I should be safe to show it here.

I did a few different versions for the organization to use (wanted to give them options....turned out they liked them all)     :-)

CQA designed a poster to feature him on (this is just the top of it)


You will see a black and yellow version winging its way through cyberspace


And, because the Big Quilt Bee initiative involves quilts made up of "slab" blocks that will be sent in by quilters across the country, I designed these blocks to accompany the bee.


I am excited to play a small part in this project.

A quick note about the design process......this was hand drawn on my iPad mini using the Concepts app and my Pencil by Paper 53


Monday, February 22, 2016

Designing....Doodled Hexagons

I have not made much progress lately in the actual painting and stitching of my "doodled" hexagons, but, I have been working to design and sort of plan out this project.
I say..........sort of plan.... because I don't really know where I am going with this, just that I am intrigued with the process and want to see where it might lead.
At this point I am trying to decide exactly what colour palette I will want to play with.....so, for now, I am creating, organizing and preparing designs that I plan to Hex.... in ink, paint and cloth.

I thought you might like to see how I go about this......it is fairly simple really.....I doodle and sketch on small templates I created for myself


I place mirrors to "see" what designs emerge


when something usable appears.....I clean it up and refine it


I also play on my computer to get a good visual of the final design. One of each (different) hexagon piece is carefully redrawn on paper that is cut to actual size...these then become the templates that I will use for the eventual trace onto cotton process


To keep it all organized, each "set" is being kept in a small zip-lock bag, stapled to the sheet containing its corresponding design.


Thursday, June 4, 2015

Coming soon

For quite some time, I have been toying with the idea of opening an Etsy shop. I think this is the year I will actually do it. While I have not yet anything to list, ( I am working on it )
So far, I have registered my shop name and created my banner.
Banner size restrictions meant I would need to work in a long narrow format.......I began drawing this mix of floral pattern


played and tweaked until I ended up with this


not sure when I will be ready to "open", but I have finally begun the process.


Wednesday, March 4, 2015

Papercutting

There seems to be a fair bit of interest in my paper snowflakes, but you know....it doesn't always have to be a snowflake shape, how about a simple square?
I used some of my designs (drawings) to see how they would look as papercuts and have posted lots of photos so you can see the progression.
I started with a 12" square piece of paper....folded in half, then in half again twice more, resulting in a triangle of folded paper (8 layers)
The next step is to unfold the paper, draw the design lines on to one segment (triangle) and refold being sure the drawn lines are on the outer layer
I use lots of staples to hold the layers tightly together. A hole punch and an awl are used to pierce the small closed areas so that I will be able to then begin cutting with tiny scissors
here you can see a few designs prepared for cutting.


I don't cut in any particular order, but I tend to cut the smallest, trickiest areas first and the larger, open areas last....this allows me to always have something fairly solid to hang on to.
In the photos below you can see the progression of one of the designs. Notice that I leave in place, as many staples as possible as I go along ( the secret, is to keep the layers held tightly together)


here is the design, carefully opened and pressed flat using a dry iron


and here are a few others I did, it is a fun way to be creative without investing a lot of time, materials or planning. I could imagine these designs as whole cloth stitching, painted cloth, stained glass, embroidery, stencils....all sorts of things


what will you create today?

Saturday, February 14, 2015

Re-Design

Near the end of 2014, I was contacted and asked if I would consider creating a logo based on one of my papercut snowflakes....this one in particular


I made a few changes and some enhancements to the original design. The completed "re-design" is shown below. Transformed from a quickly cut paper snowflake in to a sharp, defined logo


Friday, September 26, 2014

Progress

At the beginning of September, I showed a small whole cloth quilt top I was marking. It is a redesign of a previous piece. This one ( design called "Echo" ) is being done as a small white on white test/sample. This sort of stitching tends to be difficult to photograph, but these images might give you an idea of how it is progressing.


I am currently still in design mode and have created (on paper) several new designs which I am working to refine.....The one shown below is called "Grace"


finding myself in need of a portable project, I thought "Grace" would lend itself nicely to hand quilting.


Tuesday, September 9, 2014

A is for Apple


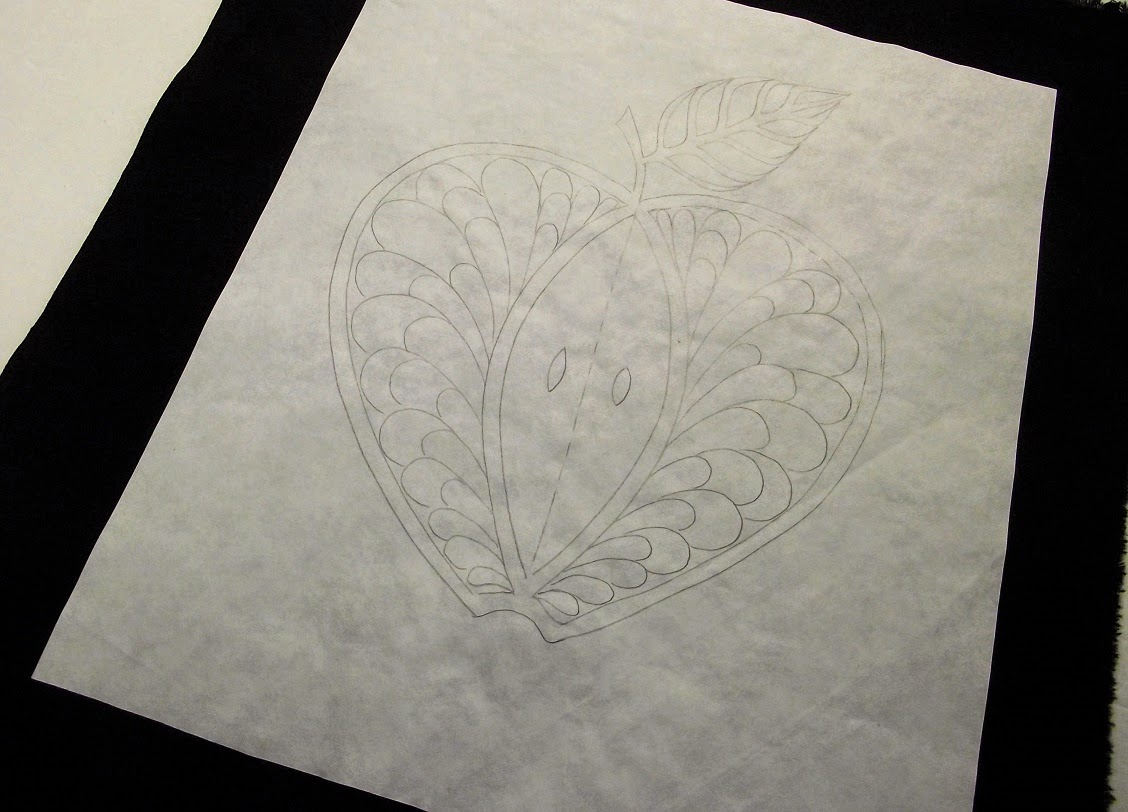
With September being National Sewing Month & back to school time, Janome Canada is celebrating with "An Apple a Day" over on the Janome Life blog.  Something "apple" related is being posted
everyday this month.  I am quite happy to be one of the contributors and since I seemed to be in design mode anyway, I created a continuous line quilt design.

I did 3 actually, 1 pretty basic, another, just a little more challenging, and a third for those who want to take it a bit further.


So, if you are interested in these designs and want to try them for yourself, head on over to the Janome Life blog and grab my downloadable  PDF.  These free designs are printable and ready for you to play with....(even if you don't want to do free motion, you could adapt them for applique or perhaps have a fabric painting/colouring session).....hope you like them!

Of course, I couldn't just stitch the design, I also thought I was due for another round of playtime with discharge paste, mine is called, "de-Colourant". You can find out more about this product here
I have shown this technique before but here is a refresher. I traced the design onto a piece of freezer paper, pressed the freezer paper to my black cotton fabric,


then went to the machine, removed the bobbin as well as the thread from the needle and stitched along the design lines in order to make perforations. The next step was to brush on the discharge paste. once I was sure I had distributed the paste evenly, I carefully peeled off the freezer paper and left the piece to completely dry.


The final step was to hit it with a good hot iron using plenty of steam. The discharge paste had made its way through the perforations, once activated by the steam, this is the result.


Tuesday, September 2, 2014

Small Whole Cloth underway

I have decided to play with the design I recently re-vamped, the plan is to use it in a simple "white on white" wholecloth piece.
This will also give me an excuse to re-visit the use of those FriXion pens. I do like the way they glide so easily across the fabric and the fine lines they make, I worry about the lines reappearing at a later time. BUT, since this is not going to be a competition piece or a gift, it is an opportunity to "test" this out again.
I enlarged my design and have begun the process of tracing it onto white cotton.


Did you know that when you are tracing, you will find it MUCH easier and accurate if you use a broken, dotted or dashed line?


Wednesday, August 27, 2014

Design Mode

I seem to be in "design mode" as of late. My needle has been idle but my pencil has been busy. A while back, I showed this quilt that I designed, painted and stitched.


Every time I walk by it, I see some things I would have liked to have done differently...........so I decided to do a little "re-designing". The changes are subtle but I like this version much better.
I've named it "Echo"


Tuesday, August 5, 2014

Building on an idea

What began during a doodle session, grew into a design with potential for use in a variety of ways. I have decided to "test" it out in the form of  a mini whole cloth.
Since I really had only drawn 1/4 of the overall design, I first needed to make copies, which were also enlarged, then trimmed and taped together to form the complete design.

roughly 20" square

Next, it was traced onto a piece of pre-washed, 100% cotton


I am keeping the process super simple, plain old colour pencil is what I am using to bring the design lines to life. In order to mitigate the possibility of smudging the tracing, I am keeping most of the traced fabric folded up as I work and only exposing as much area as needed at a time.


Randomly laying in the colour using 1 pencil each, in Blue, Green and Yellow, then blending. The colour will later be sealed with a textile medium  ( I plan to do a couple of "tests" to see which brand I like best for this project)


 I will go into more details of this process as it progresses.

Tuesday, July 29, 2014

Revisions

Still playing with the moth design, feeling that it was too "busy", a few changes have been made. I am liking this one much better. It now has more places for the eye to rest, as well as nice open spaces that would allow for some fun quilting


Friday, July 25, 2014

Inspiration

"Inspiration" just happens. My most recent post showed a lovely piece of vintage linen that inspired me to pick up a pencil and begin a new design.  As the week progressed, I drew, doodled, erased & drew some more, here is a look at the resulting design


In addition to drawing, I did mange to get to the machine as well. I created this greeting card using a small piece of the fabric I sunprinted this summer


Sunday, July 20, 2014

Vintage Linen

When I spotted this piece of vintage linen at a yard sale yesterday, I just HAD to have it! (the moth is large.....it's wing span is 19.5 inches)

perhaps this was a dresser scarf?

Upon seeing it, I was immediately reminded of this doodle I drew a few years ago


After making my purchase, I sat in the car, grabbed my tools and the early beginnings of a whole cloth design started to emerge......here is the rough idea, it will be revised many times before I am through


Don't exactly know where this will lead, but I am inspired to play!

Copyright Jill Buckley