Wednesday, January 30, 2013

Papercutting

Have you noticed the tabs just under my banner?  I am working to add new elements to this site, hopefully, to make it easier to find some of my more popular posts. I have several ideas for pages I'd like to place up there.....just need to make the time to get it done.

Now, of course, I could not create a post without any photos, so I thought it was time for new papercuts. One of my very first snowflake papercuts, was this one......the design features Dragonflies,  Bees and  Beetles.


I decided to revisit that theme and create these. (really just added an extra beetle and slightly changed some shapes...... This the cut, but still folded paper.

fully opened

Then I made the same cuts to another folded piece, but this time, cut a little more


 As you can see, it can make quite a difference to the very same design.


Thursday, January 24, 2013

Time flies

I did this doodle as a surprise for a friend back in November. Seems like only a few weeks ago....time sure does fly by.


Thursday, January 17, 2013

Snow, Ice......and a little Dye

There is no snow around here right now, but I did manage to run and scoop some right before our January thaw. This was an experiment and I am pleased with the results.  I have seen web pages on snow dyeing, once tried using ice cubes....but this time I wanted to combine the two.

I started with fabric that had been soaked in soda ash, I placed it, scrunched in a plastic dish pan


added a couple of inches of snow


poured some premixed dye  (this was leftover stuff that had been sitting around for about 10 days) I wasn't certain it would work, but did not want to pour it down the drain either.


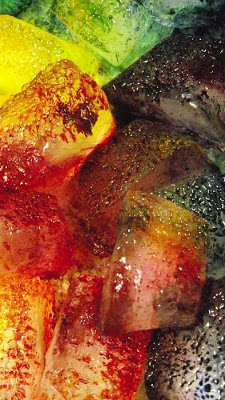
next, I layered a bunch of ice cubes on top of the dye soaked snow. On to those cubes, I sprinkled some dye powder straight from the package.


 It looked so cool as the cubes began to melt


melting

 this is what it looked like after 24 hours and I was ready to do the wash out


 The final results


I will definitely be trying this again.....but.....don't really want it to snow.......maybe I'll just go to the local arena and see what the Zamboni left for me

I am linking this to Nina-Marie's Off the Wall Fridays


Wednesday, January 9, 2013

Fun with a Glue Gun

Reading this post by Terri Stegmiller this weekend, had me searching for my ancient glue gun. When I saw what she was doing, I immediately told her that I was SO going to have to give it a go.
What the heck am I rambling about? well, follow along and you will see..... I am betting that you too, will soon be playing with your glue guns.
All I needed was a glue gun, hot melt sticks and some baking parchment

this gun is quite old and doesn't really work very well. I had to really SQUEEZE hard to get the glue to flow but I was determined to play.

I taped my parchment paper down to my cement floor......used the flowing glue to draw spirals....as soon as it cools... in just minutes, you can peel the whole thing off the paper and get to the playing part....(instant gratification!)
I laid my newly created stencil onto some plain white fabric


I did not have any "spray-able" paints so I had a good (well turns out not so good) idea to create some by adding paint to water in a spray bottle...it was actually too thin but I carried on


decided to mix up some paint a little thicker and dab areas using some nice sea sponges


 Because it started out a little wet, the result is subtle.... but actually....really kinda cool


but wait!!...there is more....you could ALSO use this as a big  rubber stamp...OR.... how about what I did next.

I placed my glue spirals onto a piece of (I dunno) the stuff that keeps things from slipping. It is a kind of rubbery vinyl weave used in cupboards, under rugs....and so on.  Anyway..the idea is just to keep your glue stencil from moving around.....and voila you have a rubbing plate


okay...so, you KNOW I am going to be playing with this ....gotta go get me a new glue gun

Nina Marie invited me to link this to her "Off The Wall Fridays" ....pop on over and see what fun and creative things others are up to.

Thursday, January 3, 2013

In my sewing room

The early stage of a fun little project


Copyright Jill Buckley