I told you I would show
how I my that little kilt.........if you want to know
why I made it, well, I guess its just because........just because I am weird.
When I saw the theme for this year's Wee Quilt Challenge was DYI Plaid, I had lots of ideas for making some interesting and complicated plaids.......but for some unexplained reason, I really wanted to see if I could make this tiny little kilt. Don't forget this pieced is quilted, which means I was going to have to see if I could actually pleat something 3 layers thick.
I started "designing" my plaid by drawing some simple lines on paper and adding colour until I had something I liked. Then I drew that same grid pattern directly onto some plain white cotton using a Sharpie marker.

Because I did not want to have to worry about a hem, I first folded the fabric in half so that the fold would become the hem of the kilt and drew the lines on both sides. (so if you look under the kilt..........you will see the plaid is the same inside and out)

I played and manipulated the fabric, used lots of pins to be certain the piece was large enough to handle all of the pleating that would soon happen


Then it needed to be coloured. I used blue, green, orange and navy colour pencils to fill in all of the squares and lines, being very mindful of the placement of each colour. Once it was all coloured, I brushed a thin layer of textile medium over the entire piece (front and back)
I cut bits away........some to be used for the waistband and some to make the side fringe. I used a lightwieght interfacing as my "batting" layer. Straight line machine quilting added the final lines of the plaid.
Normally it would be quite difficult to pleat something that is 3 layers, but I think the added stiffness from the textile medium actually helped with this, of course, so did lots of pins, a little starch and a good hot steam iron! I tried to make this piece to as functional as it could possibly be.........in other words it could actually be worn (by a very tiny person) The finished "Kuilt" is just 10"high.
Here you can see what the piece looks like when it is fully open. There are teeny darts, a little buttonhole to allow for the buckles to pass through, it even has a designer label and is finished with a very small kilt pin.

The belt loops on the back are really just for the hanging rod so that it could be displayed on the wall.


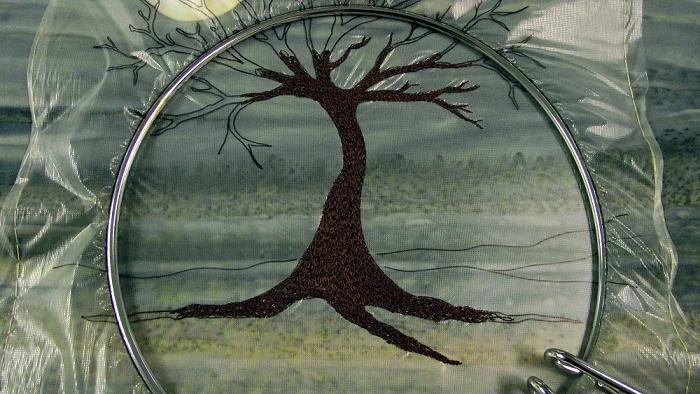 I used only 3 colours of thread.
 and this is a piece of tree I picked up while walking through a park the other day. The tree is dead and has been stripped in preparation for carving.
 Check out the texture ( This is what it looks like under the bark, I think it might have been caused by the Emerald Ash Borer, which has destroyed many trees) I have some ideas for this piece of wood


