Wednesday, August 26, 2020

Masks and Painting Progress

You are all probably growing tired of seeing all the mask tutorials circulating online, but I think we are gonna be wearing them for quite some time. So, why not have a design that is easy to make, functional and great fitting. I am not doing a tutorial here....instead,  I am going to direct you to the site of the amazingly talented Judy Coates Perez where she has posted a wonderful step by step tutorial, includes a link to a video by the original designer and as an added bonus, Judy has designed fabulous fabric that you could purchase to make these masks (each one is her incredible artwork)

I have made a few in this design and I have to say they are the best fitting yet, the shape gives you more breathing room and allows for a much better fit on the face. I originally made masks fashioned after the pleated medical type.....I like this newer design so much better.  I followed the instructions but I did make a couple of modifications. 


instead of a 3rd layer of cotton, I stitch a piece of non woven stabilizer to one of the cotton layers. ( its the stuff people use to stabilize/back machine embroidery work. It acts as an excellent filter.
 

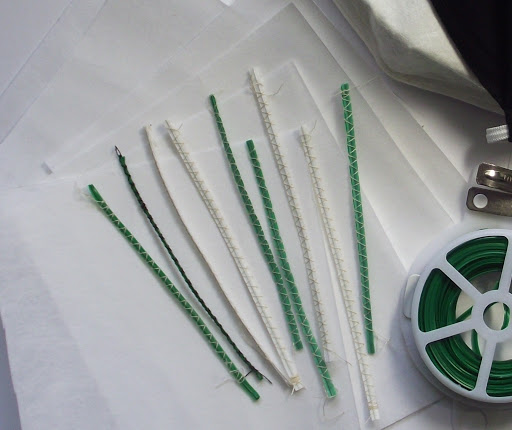
for the nose wire.....I have been using twist ties. but sometimes they are pretty flimsy so I get around that by putting 2 or 3 (depends on what I feel it needs) together and then doing a zig zag stitch over top to keep them all together to serve as one solid bit. 

 this design also makes the masks reversible.....so you can use a vivid fabric print on one side and something a little more subdued on the other.  wear the one that matches your mood (or situation) that day. of course, be sure its been washed before switching it out.

Currently it can be difficult to avoid both news about Covid-19 and politics......while I strive to stay informed, I decided I also needed to find something positive to focus my attention on. Back in the spring I joined Anna Mason's School of Art. I have been working though a variety of skill building lessons

I thought I would show you my most recent paintings. This one was a lesson on how to handle painting glass.

and this Rose is an "advance" level lesson. I was concerned that I might not be ready for the complexities of this one, it took me a very long time, I worked slowly trying to capture the detail. I love that you can loose yourself and shut out the rest of the world as you put brush to paper




Friday, June 19, 2020

Online Learning

While I already had lots of things to occupy my time during our pandemic lock down, I thought why not take this as an opportunity to learn something new.  You see, I have always wanted to learn to paint with watercolour.
Over the years, I have taken a few classes but never came away feeling that I could "do it"  I have come to realize that those failed attempts were more about the instructor than me.  How is that? well....the first time was probably 35 years ago, the instructor, while critiquing our work was pretty brutal, and worse yet, she painted right over your work when explaining what it was you should have done. It was an 12 week course and she turned me right off!  Then, roughly 20 years ago I took another course.....this time the instructor was much better.....however at the end of the course he suggested that watercolour was "not for me"  he told me that my work looked more like photographs than paintings. (apparently that was a bad thing)  he added....."if you want a photo...get a camera" so you know....the supplies went in a drawer and stayed there.
Fast forward to last month when a post by Anna Mason popped up in my Instagram feed.....oh my...her work is spectacular and she was offering 2 free classes. So what did I have to loose?  I did those classes, was immediately hooked and joined her online school.  I have signed on for 6 months to start.
The most important lesson of all is that sometimes its NOT you.....perhaps you just have not found the right teacher.  Anna's realistic style and superb instruction is exactly what I needed.

As I show you these paintings.....note that for most of them, I am simply following the lesson plan, Anna takes you through every stage, step by step guiding you in what colours to use, where to place them and what consistency they need to be mixed at. So until I try something on my own I feel that perhaps I am just a good copycat.  At the end of this post  I will show you my first attempt at doing a painting completely on my own.....I think it shows that Anna's method "clicking" for me.

These 2 above, the pear, and the anemone are the free classes offered. If you are curious, you can find them here

Once I became a member of Anna Masons School of Art, I began working through some of the beginner courses, the Pumpkin and Snowdrop are a couple of examples of beginner lessons.
I have completed about 10 lessons already and am LOVING every bit of it. I am not going to bore you with all the paintings but will share a couple more.

I moved onto some intermediate level tutorials of which this Magnolia is one.

As I pointed out, when working through lessons being completely guided every step of the way....am I really and truly learning? how would I know unless I try one on my own without being told what tone and hue to apply, when, where and how to apply them. So, I did attempt a painting on my own, the orchid you see below. I am quite happy with how it turned out overall

I really feel that this time I have found the right teacher for me.....and I am thrilled!

btw.....clicking on each image will give you a closer look 


Sunday, March 22, 2020

Problem solving

A while back, I showed you an Indian Book Charkha that was given to me. At the time, I did not realize I was missing some essential bits.  I did play with it, learned how to use it, but then put it away as I could not actually create much with it. 


here is where the problem lies. I could spin, but I kept running into issues with the yarn working its way up the spindle shaft and eventually getting caught up in the mechanism which just chewed up the yarn I had spun.


Why? well because there is supposed to be a little disc that works as a stopper of sorts, I did not have those so I needed to work that out, and that was only one of the problems, I also had to figure out how I was going to get the yarn off the spindle smoothly to be able to ply it....I worked that out too!

lets start with the spindle.....here is how one should look... notice the little metal disc.....(this is a screen grab from The Woolery)


and here is what my spindles look like.....can you see what is missing?


I should point out that I did not get it quite right the first time....my solution evolved so I thought I would show you the whole thing (not just the end result)

I looked around the house for disc like things.....metal washers had too large a hole, were too heavy....cardboard degrades too quickly, I needed something lightweight, rigid, super smooth and the right size to still allow room for the spindle to spin. I grabbed some fridge magnets that looked about right....I popped out the magnet itself, made a small hole with and awl in the plastic and inserted the spindle.....YES! that worked, and worked fairly well.....trouble is that these things have a very rounded edge and so I would not be able to put a lot of fibre onto each spindle before the yarn I was spinning would fall off the edge.


So, I again combed through various drawers and boxes and came across some plastic that I used to use when I made costumes.....this stuff is what I used when I needed to build rigid elements into pieces.


I cut some discs from this plastic and began using with the plastic disc from the magnets.....I now had a better, flatter surface to build the cop.......I think it took a day or so for the light bulb to come on.....I no longer needed that thick fridge magnet plastic......I could use the spindles with that cut plastic only. the image below shows the end result, it works even better than I had hoped.


my next problem was how to get the yarn to pull off smoothly so that I could ply it. I needed something to hold the spindles in the right position for this.....and that was an easy fix. I grabbed my lazy Kate that I use with the bobbins for my spinning wheel. On the side I placed some screw eyes that would allow the spindles to sit in and spin easily.  This ultra simple little modification works amazingly well.

 you still see those thicker plastic discs here because this is the yarn I spun before the light bulb came on.


I am now using the spindles modified with the white plastic which is wonderful because everything still packs nicely inside the book Charkha, and finally, here is my test mini skein...it was spun using the book Charkha and then chain plied using my spinning wheel...the fibre is merino and silk.


I should note that traditionally these Indian Book Charkhas are made for spinning cotton....I currently don't have any cotton but I was not about to let that stop me from using it


Thursday, February 6, 2020

Long overdue

Whoa!....... I have not posted here in nearly a year...how the heck did that happen?!!

It is not that I haven't been creating, I suppose it is just that I have not spent as much time documenting my process as I used to.  But I do have some photos to share that will give you an idea of what has consuming my creative time these days.
In my last few posts I talked about my journey into spinning.....at that point I was using spindles to spin yarn but that all changed last summer when I had the opportunity to acquire my very own spinning wheel.
Those of you who have followed me for years know that I LOVE a challenge. My wheel was new....but here is the thing....it left the factory in 1985 exactly how I got it....in pieces, in a box, in need of sanding, finishing and assembly....so the brand new wheel I put together in 2019 was actually 34 years old....how cool is that?!


here it is assembled and working wonderfully


In July, I was gifted this vintage Book Charkha which is a fascinating device with such an interesting history.


You likely also know that I kinda like to try to build my own tools when I can. Because I have a nice supply of raw fleece to process, I was interested in getting some wool combs for prepping fibre that I could spin on the spinning wheel....but holy cow they are very expensive and while I am sure they are worth the cost I was not prepared to spend a lot of $$$ until I could see if it was something I would enjoy doing regularly......so I set out to make my own.

I found some onions holders on a clearance rack which was great cause if the experiment did not work, I wouldn't be out much.....Bonus!


I cut the plastic handles off, used some very strong double sided tape to hold them together slightly offset. I used a "found" hardwood shelf to cut into a couple of blocks of wood that the "tines" would be placed into. I borrowed my son's Dremel tool to hollow out a cavity in those blocks. that was a little labour intensive but remember....I do like a challenge. 


Once the cavity was clean and smooth I filled it with the onion holders, sawdust and wood glue. handles were made very simply with doweling. (if I ever do this again I will do something different as this is not the most ergonomic on the hands)


in the image below you can see the raw fleece locks on the left and the combed fibre on the right


These combs may not be pretty but they are holding up to the rigors of combing and actually work quite well.

My latest obsession is a result of this book I got a couple of weeks ago. It is Arne and Carlos Field Guide to Knitted Birds. oh my.....the book is gorgeous and these little birds are just way too much fun to knit and a wonderful way to use small bits of my hand spun yarn ( all but the black one in the photo have been knitted with yarn I processed, dyed and spun.)


I will try not to let so much time pass before my next post....but you can always find me on Instagram
just click the Instagram icon in the upper right corner of this blog.


Copyright Jill Buckley