Friday, August 26, 2011

Artist in Residence

That's me!
When I was asked if I would consider taking on the job of CQA's Artist in Residence, I immediately said yes..........what a fabulous opportunity and learning experience this will be. I am thrilled to be a small part of the Editorial team.
A couple of weeks ago I had mentioned that CQA members would be hearing more from me very soon.........well the latest issue of the Canadian Quilter is out and contains my first article.
here is a sneak peek......( sorry, that is all I can show)........ members will see the pattern, instructions and tips found on the next pages.I know that not every project will appeal to all quilters, but I am hoping to provide a wide variety of designs and techniques over the coming year that members will enjoy and find interesting. The deadline is fast approaching for my next submission.

Want to know more about The Canadian Quilter's association? click here

Sunday, August 21, 2011

Sewing in "Reverse"

The one thing I would guess we all dislike having to do, is to sew in reverse (rip out stitching) but I decided I had to go backward in order to move on. A few posts ago I showed the center portion of a bed quilt I am currently working on. Well, I really, REALLY, did not like the look of those blue strips separating the blocks, I just knew they HAD to be removed. I suppose that is a downside of not following a pattern and "making it up" as you go along.
Not sure why I was bothered by those strips..........just seemed a bit cluttered, I am much happier with this cleaner look. Here is the pieced top, which measures 102 x 108 inches. Now I just have to find a space large enough to lay it out for the backing, batting and basting process.

The job of stitching on those long borders was made super easy by using the 1/4 inch walking foot system available for my Janome 6600P

Wednesday, August 10, 2011

From a little idea...............

This past May, the CQA (Canadian Quilter's Association) mini conference was held here in London ON. I designed and created a pattern especially for the event. This leaf shaped fabric bowl (we are the "forest"city after all)Originally, I thought that a few would be made as decor, but the local organizing committee had other ideas and the project took on a life of it's own. The pattern was sent to guilds across the country and was printed in this issue of CQA's The Canadian Quilter.
It wasn't long before the "leaves", made by quilters from coast to coast began arriving. In this article, you can see that Christine is nearly buried under just a small sampling of what arrived at her door. 100s of the bowls were given away to quilters during the 4 day conference, and those who attended the Gala banquet received their leaf bowl filled with all sorts of fabulous quilty treasures.
This was the first time I had created a project for others and I was completely amazed by the response.
Are you a CQA member?...........if so, you will be seeing more from me very soon....ah, but that is another post.


Monday, August 1, 2011

Temporary Art

I visited the Imadon street painting festival that was going on this weekend. Can you imagine doing all that work only to have it disappear within a few days (sooner if rains are heavy)? The artist's spend several days in awkward positions, on hard asphalt, under the hot sun as they produce incredible works with simple chalk pastels.......I just HAD to buy some for myself :-)
I only took photos of this artist's work, with her permission, of course. Axl T. Ernst was the feature artist this year.........can you see why? You can visit her web site here and to see more photos of this work in progress, go to her blog here
It really is quite amazing to see what can be achieved on such an unforgiving surface, the work is so fabulous you may not even notice the patched cracks in the asphalt or the parking spot lines.
I could not resist a photo of the state her shoes were in as she neared the completion of the festival.

Wednesday, July 20, 2011

Making a Cling-On

I had picked up a few unmounted rubber stamps recently and wanted to make them usable with my clear acrylic blocks, but a rubber stamp doesn't stick to them the way the "cling mount" types do. Instead of going out to purchase a special product made for this purpose, I thought I'd see what I had on hand to do the job.
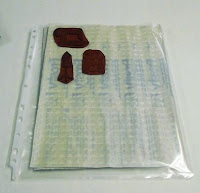
I dug out this roll of window film and some double sided tape.I applied the tape to the back of the stamp, laid a piece of the window film, non-sticky side down and pressed it firmly in place.
I then trimmed the film very close to the edge of the stamp and removed the backing paper. It can now be used with an acrylic block, removed and repositioned over and over.Here is a piece of fabric I went a little stamp crazy on.
I rinsed the stamp clean, left it to dry and found that it did retain it's "stickiness"
A piece of that same window film serves as a sheet to store my stamps on as well. This will make them easy to store and organize. (actually a plain piece of clear vinyl also works really well to store them on )

Tuesday, July 12, 2011

Lots of Pieces

I started a bed quilt a little while back but then it just sorta got left sitting on the shelf. Projects sitting unfinished drive me crazy (not a long drive mind you) so I thought I'd spend some time getting back at this one. The center is complete and I am now deciding how I want the borders, I think I want to make this roughly King size..........I am quickly discovering that is a lot of 6" blocks.
And look what just arrived in today's mail..........these are fat quarters I won thanks to an online quilt show/contest that happens weekly at the Quilting Gallery. Every week there is a different theme, it is super easy to enter. You simply upload a photo along with a description of your piece, viewers come to the show on Friday through Sunday to choose their favourites, the quilts with the most votes wins a prize donated by generous sponsors. Even if you don't want to enter it is always fun to see the wonderful quilts.
These fabulous fat quarters came from Cheryl at On The Grain Fabrics, thanks so much Cheryl, these will work themselves nicely into the quilt above. (btw, Cheryl is the sponsor again this week)

Tuesday, June 28, 2011

Trees.......thread and real

Here are a couple more photos of the tree I have been working on as a thread painting lesson. (see my last post)
I used only 3 colours of thread.

and this is a piece of tree I picked up while walking through a park the other day. The tree is dead and has been stripped in preparation for carving.
Check out the texture ( This is what it looks like under the bark, I think it might have been caused by the Emerald Ash Borer, which has destroyed many trees) I have some ideas for this piece of wood

Monday, June 20, 2011

Following a lesson plan

A little while back The Quilt Show had several video lessons by Nancy Prince on thread painting. The first project was called Solitary Tree and I decided to follow along. There was a downloadable file of a tree that could be printed, but I wanted to use my own drawing for this.
I started with a very cool piece of fabric for the background and hand appliqued this circle to represent the moon.Next, the tree was drawn using a Sharpie marker onto some water soluble film
It was backed with stabilizer, then put into a hoop
and following the directions.........the free motion stitching has begun.

More to come

Wednesday, June 15, 2011

How Unfortunate........

As many of you know I had the distinction of designing the logo for the CQA mini conference, Quilt Ontario, that was held here at the end of May. That logo appeared on bookmarks, posters, in the CQA newsletter, brochures and even on tote bags, and each time the logo was just as it had been designed. Of course, the conference is over, the paper is probably in the shredder or recycling bin, and the bags will likely end up in a drawer somewhere.
The one thing that will be around for a long time are the pins that were made, attendees purchase these pins, many collect them at conferences year after year.
How unfortunate that someone at the company producing the pins decided to "change" the artwork. Now I am fully aware that when reproducing artwork on a pin that is roughly 3/4" across, it may not have the same level of detail.......BUT.......I certainly did not expect to see this.

Here is the way the artwork has appeared on everything.....except the pin

here is the pin.

an employee at the company decided that the roots and branches should be black...........uh......that is not how it was designed and not how it was supposed to look.

Apparently this employee felt that he(or she) were "improving" the design.
How unfortunate.

Edit: It was and is not my intention to make an issue of this. I just found it curious that the artwork was reproduced unchanged on a great many items..........what circumstances led to the pin being different, I don't know. The company responsible did acknowledge the error and has made an effort to compensate for it. I guess the lesson is that it is always a good idea to be sure you can get approval when having work like this done to avoid surprises.

Wednesday, June 8, 2011

Because you know I am wierd......... right?

I told you I would show how I my that little kilt.........if you want to know why I made it, well, I guess its just because........just because I am weird.
When I saw the theme for this year's Wee Quilt Challenge was DYI Plaid, I had lots of ideas for making some interesting and complicated plaids.......but for some unexplained reason, I really wanted to see if I could make this tiny little kilt. Don't forget this pieced is quilted, which means I was going to have to see if I could actually pleat something 3 layers thick.
I started "designing" my plaid by drawing some simple lines on paper and adding colour until I had something I liked. Then I drew that same grid pattern directly onto some plain white cotton using a Sharpie marker.
Because I did not want to have to worry about a hem, I first folded the fabric in half so that the fold would become the hem of the kilt and drew the lines on both sides. (so if you look under the kilt..........you will see the plaid is the same inside and out)
I played and manipulated the fabric, used lots of pins to be certain the piece was large enough to handle all of the pleating that would soon happenThen it needed to be coloured. I used blue, green, orange and navy colour pencils to fill in all of the squares and lines, being very mindful of the placement of each colour. Once it was all coloured, I brushed a thin layer of textile medium over the entire piece (front and back)
I cut bits away........some to be used for the waistband and some to make the side fringe. I used a lightwieght interfacing as my "batting" layer. Straight line machine quilting added the final lines of the plaid.
Normally it would be quite difficult to pleat something that is 3 layers, but I think the added stiffness from the textile medium actually helped with this, of course, so did lots of pins, a little starch and a good hot steam iron! I tried to make this piece to as functional as it could possibly be.........in other words it could actually be worn (by a very tiny person) The finished "Kuilt" is just 10"high.
Here you can see what the piece looks like when it is fully open. There are teeny darts, a little buttonhole to allow for the buckles to pass through, it even has a designer label and is finished with a very small kilt pin.The belt loops on the back are really just for the hanging rod so that it could be displayed on the wall.
Copyright Jill Buckley